MichaelMassie.com/projects
Project Journal
Restoring An Heirloom Violin With 3d Parts
BACKGROUND:
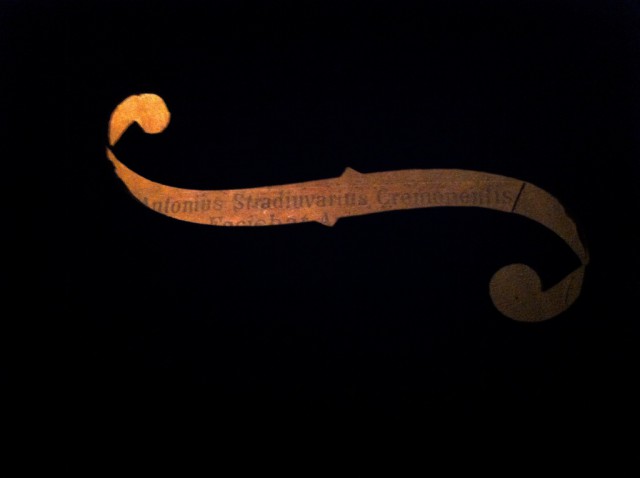
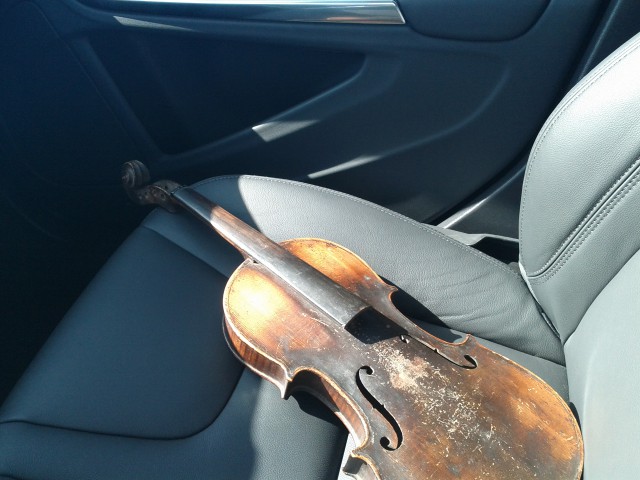
For as long as I know this violin was hidden at my Grandparent’s house, came over with my family from France, and rarely got pulled out. This is an especially sensitive item because the name written on the inside holds the name Stradivarius. After my Grandfather had passed and my Grandmother moved into assisted living, I was given the honor of being the caretaker of the family violin. What I received was a neck (separated from the body), the body, and one tuning peg. The only thing that I knew about this violin is that no living Massie, or person for that matter, has heard it played.
“When Grandpa (Albert Massie) was a kid, in the back of magazines, there were ads, to find missing Stradivarius violins. He wanted to find out if it was a real one and dreamed of all the things he could do with the money if it was. They wanted you to send in the violin to find out and he knew not to do that. When he and grandma were married, they too thought what if it was the missing violin and they then had the dreams of fame and fortune. He said someone used to play it at the farm for entertainment, when he was a kid.” - Jan Massie
Before any repairs could happen I’d have to find out exactly what I had in my hands. Lucky for me there is another, more famous, Strad in Milwaukee and I was able to get the name of the craftsman that maintained it. A quick visit to him and I learned the following about our family violin:
- Original Strads had the writing right on the wood - due to cost of paper and lack of production quality of glue - this was written on a label
- This one pre-dates American laws that required that a country be printed on the label. This puts the violin in a ~20 year window and more accurately around 100 years old.
- The pigment color in the stain says that it’s most likely French or German made and also confirms that ~100 age.
- The single peg was made of a softer wood that typically used ebony, meaning this was an even lower end piece.
REBUILD:
I investigated options from paying to have it repaired back to play grade, repaired enough to be an art piece, or just leave it as is. It is a family heirloom so lending it for someone to play was selfishly not attractive. Repairing it with current parts would obfuscate what was part of the original and what is new. Finally, leaving it busted up was just not cool.
At a later trip to the museum I saw the T-Rex had a bright white resin femur place holder unit they could get a real one. I assumed the stark contrast in color was to not confuse what was original and what was a replacement. I.D. Magazine also had an article about soem Dutch students repairing damaged wood furniture with lime green plastic replacement parts inlaid with the originals.
These use cases inspired me to try replacing the parts in some type of acrylic or pop color plastic replacement.
PROCESS:
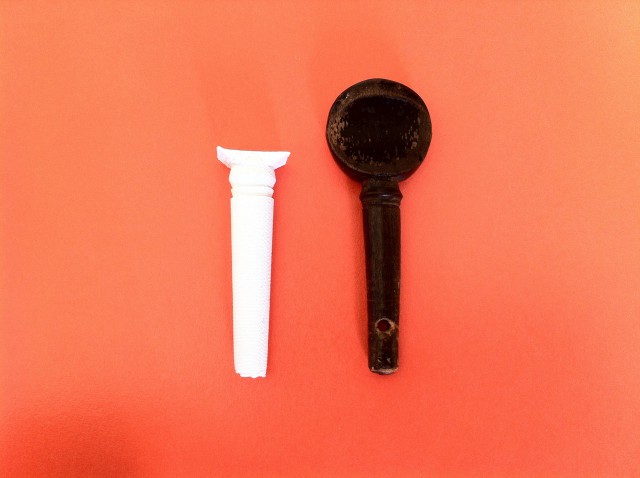
As a Milwaukee Makerspace member I felt the best solution would be to replace all the missing pieces in 3D prints based off original parts (scanned and/or measured out). I additionally chose white cause it stood out against the dark wood.
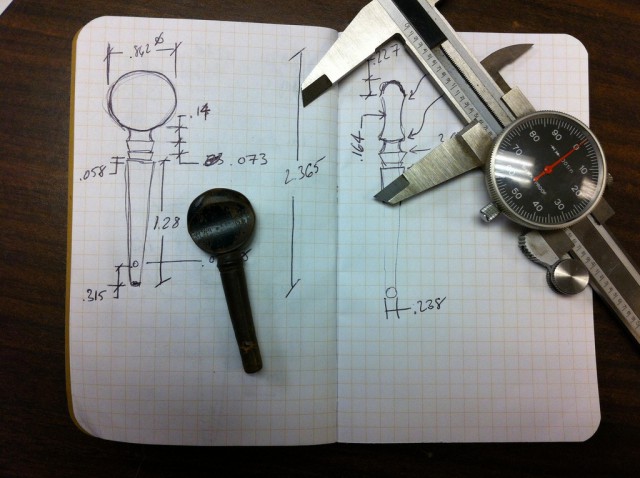
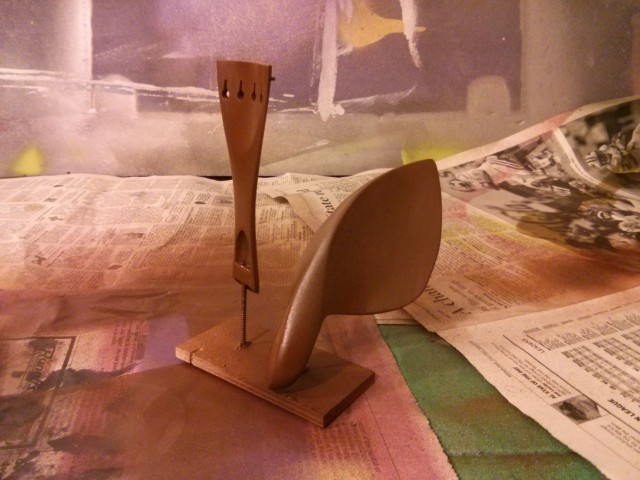
I measured out the Tuning Peg by hand, rebuilt in SketchUp (don’t laugh) and printed to a Makerbot Replicator for first run prototypes.

Similar models of the tailpiece and the chin rest were purchased, sanded down, painted a flat grey and then scanned on a 3D scanner.
Once all pieces scans were complete, it was time to bring it all together (Thingiverse STLs - Violin Peg, Chin Rest, Tailpiece)
This was the easiest part, cause it just involved me handing someone a bag of money. Final edited STL’s were sent off to Shapeways to be printed and once returned all parts were taken to someone to be cleaned, assembled, strung and tuned.

So now that it is done, it’s time to get it into able hands to have it played for the living Massies.
tags: 3dPrint - Violin